Saturday 11 May 2013

LUSH - Favourite Products

Currently I have an obsession with LUSH products. They smell absolutely divine. I’m also a sucker for any bath product or facial. Lately I’ve been into a LUSH store once a month to hand over a huge chunk of cash for some delicious smelling goodies. In this post I’m going to go through my top three favourite products.

There is nothing I find more relaxing than a bubble bath and facial at the end of a long stressful day. I was overly excited to learn that LUSH does a bubble bath product. However this is no ordinary bubble bath. This amazing little product comes in the form of a bubble bar. All you have to do is break a piece off, crumble it up in your hand and then place the product under running water. You are then rewarded with a surprising amount of lush bubbles.
My favourite bubble bar has to be Karma. I think I’ve managed to buy about four of them in the span of two months I love the smell so much.
LUSH description for Karma Bubble Bar - Our signature fragrance for bath time: oranges and multi-layered spices. Karma is a fragrance that keeps on giving. Each time you catch a whiff of its many-layered fragrance, you notice yet another thread in its multi-stranded personality. Top notes, middle notes, base notes and all the notes inbetween disentangle themselves before you. Bathe in a fluffy Karma bath and you’ll generously perfume the whole house with its fragrance (and yourself, too). 

Karma Bubble Bar


To accompany my bubble bath of course I had to buy one of LUSH’s fresh face masks. I have to say the staff in LUSH are absolutely wonderful and extremely helpful when it comes to picking products that are best suited to you. Depending on the time of year my skin goes from dry to combination. At the moment it is combination which leaves me with an oily t-zone. On explaining this to one of the staff members I was recommended several of the fresh face masks best suited to my skin. I ended up picking The Sacred Truth and I’m very happy I did. I’m not overly fond of the smell of this product but it makes up for this with the way it makes my skin feel. I apply this mask and leave it on for roughly ten minutes. After this time it is slightly dry so I wet my hand and start rubbing in a circular motion all over my face. This fresh face mask has a slightly gritty texture to it so I use it to exfoliate as I remove it from my face. Once removed my face is left with a slight residue. I usually hate when products do this but The Sacred Truth leaves my face feeling smooth, soft and moisturized.
LUSH description for the Sacred Truth - The truth is, we all need protection from ageing. The vital antioxidant action of wheatgrass, ginseng and green tea combines with fresh papaya, cleansing clays and nutritious butters to defend the skin. This mask delivers live, fresh, active ingredients, which enhance and refresh the complexion. Apply to clean skin, avoid the eye area. Leave for five to ten minutes, and then rinse away with warm water. Keep chilled.

The Sacred Truth

I love anything that has a citrus scent. I just can’t go past that clean crisp smell. So when I saw a YouTube review for the product Lemony Flutter I simply had to have it. Working in a heavily air-conditioned supermarket for long periods of time really dries out my hands. That is not an attractive trait if you do makeup artistry on the side. No one wants dry, cracked hands going near their face. So I heavily moisture. All the time. I find that a lot of hand creams will immediately make your hands look better but once you wash them they’re back to being dry and flaky. One thing about hand creams that I can’t stand is the ones that don’t absorb well. When I first tried Lemony Flutter I was a bit disappointed to find that my hands looked and felt really oily after applying. However after about ten minutes the product had completely absorbed into my hands. I also noticed that I didn’t need to apply the cream as often as I had been others because when I washed my hands they were still moisturised. I really do love this product and would recommend it for anyone who adores the scent of lemons or anyone who has really dry hands.    
LUSH description for Lemony Flutter - Softens hard skin all over the body, especially the cuticles. We made Lemony Flutter to soften your cuticles; it’s our thickest cream out there. It’s so good at softening your cuticles and nourishing your nails that LUSH customers have been using it to soften and nourish lots of other body parts like their feet, elbows and knees. Fortunately, it’s a very reasonably priced cream so you can afford to use it as widely as you wish. Take more care of your extremities and invest a small sum in a Lemony pot.
 
Lemony Flutter

Saturday 4 May 2013

This is what Delicious Looks Like

When I make a dessert I usually take it to work, much to my family’s disappointment. So far everything has been a hit. One of my absolute favourite desserts at the moment is Lime Meringue Tarts. Lately I have been making them all the time and force them on my work mates. They are probably the one dessert that I get the most comments on. They are packed full of flavour, both tangy and sweet and very, very moreish.

Lime Meringue Tarts

Growing up my dad used to make Lemon Meringue Pie on special occasions for my mum. As delicious as that was I have to say I prefer the lime over lemon. There is just something about the fresh, tangy smell of lime that I can’t pass up.

My obsession with baking started after watching Masterchef for a few years. Watching it night after night I started to appreciate the taste and flavours of food more. Having a sweet tooth is what encouraged me to start baking. I am definitely a baker and not a cook.

In 2011 Kate Bracks won Masterchef and released her book The Sweet Life. This is where I found the beloved Lime Meringue Tart recipe. Her book has some truly amazing recipes some of which I have made and some of which I can’t wait to try. For anyone that loves to bake I strongly recommend investing in her book.

Quick tip for those looking to make Lime Meringue Tarts:
The first couple of times I made these tarts I struggled to get them out of the tin. I grew frustrated trying to pry them out without marking my cupcake tin. One day while surfing blogs for recipes I came across a helpful hint that has made my life so easy. It takes some time but is so worth the extra effort.
Grease a cupcake tin with butter. Tear off some baking paper, fold in half, cut along the fold and then cut into strips. Place one strip of baking paper into each cupcake whole. Place a little bit of butter on the centre on the remaining pieces of baking paper. Place these pieces in the cupcake wholes to form a cross with the already existing piece of paper.
One your tarts have set this allows you to easily pull the tarts straight out of the tin without having to use a knife.

Friday 3 May 2013

Just a Quick Post

Hey everyone,

Sorry I’ve been absent from the blogosphere for so long. Between my day job and photoshoots work has been full on. I’ve also travelled down to Sydney for a family wedding.

I’m aiming to do a post for Tuesday on my favourite LUSH products. Lately I’ve been obsessed with everything LUSH. Their products are amazing and smell divine. I also love that they are completely organic.

Another thing I’ve been contemplating blogging about it is a food tour of Brisbane and Fortitude Valley. I absolutely love food and eating out. I’m hoping to do more of it in the next couple of months resulting in two restaurant reviews/recommendations a month.

As I mentioned, I have also been doing a lot of photoshoots lately. Would anyone be interested in seeing a behind the scenes blog post or blog post with images from shoots I’ve worked on?

Comment below if there is anything particular you would like to see in blog posts to come.

Tuesday 2 April 2013

OPI Giveaway - Closed

If you are following my Facebook page you will know that I am soon to have a huge giveaway when I hit 500 likes. I’m currently sitting at 250 and would like to thank everyone by having this mini giveaway. Why am I having it on my blog? I recently found out that apparently your Facebook page can be shut down without warning if you don’t follow the rules on giveaways. So rather than risk enraging the Facebook Gods by trying to be all sneaky on my page I’m doing the giveaway over here on my blog.

To enter you have to like my Facebook page Elise Kate Makeup because really, this giveaway is for everyone who has supported me so far. How do you enter? Simply leave a comment on this post telling me which OPI nail polish you would love to own. The winner will receive the OPI nail polish left in their comment.

Just remember the nail polish must be available for me to purchase, so you can check out what is currently available by looking on the either the Myer or David Jones website.

Good luck!  
 
Terms and conditions
The promotion will run from Tuesday 2nd of April until Saturday 6th of April
One entry per person
All entrants must live in Australia, no overseas shipping
Winner will be determined by random.org
The winner will be contacted via email
The winner will not be announced on Facebook due to Facebook regulations – Otherwise Elise Kate Makeup page may be shut down
Prize may take up to 14 working days to be received
Elise Kate Makeup will not be held liable if you are unsatisfied with the item you receive
Elise Kate Makeup will not replace any items should they not be received or if they are received damaged
All items are mailed via regular post – If you wish for the item to be sent via express/registered mail then this will be at your own cost

Tuesday 26 March 2013

Egyptian Magic

118ml (4oz) tub of Egyption Magic
Recently I have been hearing only good things about a product called Egyptian Magic All Purpose Skin cream. This cream is made up of six ingredients from nature, making it 100% natural and derived only from living plants and organisms. It contains olive oil, beeswax, honey, bee pollen, royal jelly and bee propolis.

This cream can be used for a number of different things including but not limited to hand cream, night cream, scar reduction and bruising reduction.

On a recent visit to my favourite makeup store, Makeup and Glow, I decided to purchase this amazing little tub of magic. The cream has a Vaseline type consistence in the jar. To apply it you simple take a small amount out of the jar, rub it between your hands until it resembles oil and apply. A little bit really does go a long way, so I’ve used hardly any of my jar.

So far I have been using it for a week. I suffer from very dry skin all over my body and occasional eczema on my upper arms. Normally I have very dry and flaky skin on my shins, after using this product for a week I have noticed a definite improvement in my dry skin. My skin is still slightly dry but definitely improved and it no longer has that dry flaky look. I’ve also noticed that the eczema on my arms isn’t as bad. There are still dry spots on my upper arms but all redness is gone.

Overall I think it’s a good product. It’s a definite plus that it’s an all-natural product. In my opinion it is a little pricey but so far it’s been worth it.


Monday 18 March 2013

March Bellabox

In a previous post I believe I mentioned the Bellabox. The Bellabox is a $15 a month subscription. Every month you are sent five to six beauty products to test out. Sometimes you will receive sample size products and other times you can get full sized products. It’s a great little subscription if you are always on the hunt for new beauty products to try out.

So to give you an idea of what to expect from the Bellabox I have decided to dedicate this post to the March Bellabox.

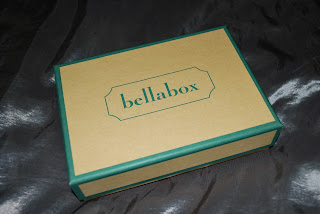
Firstly once you open the postage parcel you will find a cute little box that contains all your goodies.
 

When you open the box you will find a card that lists all the products in the box and what their retail value is.
 

 Under this you will find your products wrapped in tissue paper.


This month I received two full sized products which I’m pretty excited about but I’ll go through them in the order that’s on the description card.

First product out of the box was Ocean Essence Summer Breeze Shower Gel. The bottle itself is pretty small. I haven’t used it yet but I did open it to see what it smelt like. Honestly I wasn’t over excited with the smell, it was pleasant but nothing unique.
This products retail price is $4.95 for 20ml


The second product is a Designer Brands Lip Pencil in the shade 629 Nude. This is one of the full size products. At $4.99 a pencil its pretty good value. The texture of the pencil is average. It applies easily but isn’t as nice as some other lip pencils I’ve tried. The first thing I noticed and liked about this product though was that the pencil lid had an inbuilt sharpener which I find really nifty.
 

Third product is Suigo Ultimate Control Shampoo and Ultimate Control Conditioner. The bottles are a decent size so I will be able to get several washes out of them to determine whether or not I like this product. It is supposed to be for weak brittle hair. At the moment my hair is pretty health so I’m not sure if it will show any improvements.
These products come in 260ml bottles, both at $22.50


The fourth product was another full sized product. I received a Clinique High Impact Lipstick in the shade Extreme Pink. These lipsticks retail at $36 a piece so some months you definitely get your $15 subscription back in product. The lipstick isn’t a colour I’d pick out for myself but it feels nice and moisturising. I’ll definitely give it a go.


Lastly I received a Swisse Active Energy Bar. I found this a bit random as I’ve never received a food product before. However I do like the Swisse range so I may try it.
Product retails at $2.39 a bar


Well that is all for today. Comment below if you want to see more Bellabox posts.

Saturday 9 March 2013

OPI - Goldeneye

Sorry I haven’t posted this week, I’ve been pretty busy with work this week. So here is just a quick nail blog as I didn’t have much time to do anything else.

Recently I have been obsessed with OPI polishes. They have an amazing array of colours as well as textures and finishes. Of course at the moment my favourite nail varnish is of the OPI brand. For Christmas I received the mini nail lacquers set called the Bondettes, this of course was released around the same time Skyfall came out in cinemas. I absolutely love the Bond movies and was excited to try out the four mini polishes I got. I immediately fell in love with the colour Goldeneye. It is this amazing gold that is glittery and shimmery. Honestly it is absolutely divine. I’ve taken a couple of snaps of my manicure but honestly the photos don’t do this polish justice. If you love gold I seriously suggest investing in this colour and if you don’t like gold? Seriously, invest in this polish anyway. Just remember that any collection brought out is only stocked for a short time.

Goldeneye + Alpine Snow

Goldeneye + Alpine Snow
As you can see I haven’t painted all my nails with Goldeneye, the polish on my ring finger is another OPI varnish in the shade Alpine Snow. I found I had to apply three coats of the white to get a solid colour where as I only needed the two coats with Goldeneye.   

Saturday 2 March 2013

Brushes Part 2 … How to Clean Brushes

Earlier in the week I posted about why it is important to clean your brushes and now as promised I’m writing a post on how best to clean your brushes.

The quickest and easiest way to clean your brushes is to spot clean. To do this you simple take a tissue, spray on some brush cleaner and wipe your brush backwards and forward. You do this until there is no product left in the bristles. This is an easy way to remove colour from eye shadow brushes for people at home who don’t want to deep clean their brushes every day. Makeup artist also do this between clients. Not only does brush cleaner remove makeup from brushes it also sanitises them, killing that unwanted bacteria I mentioned earlier in the week. I couldn’t find the Gorgeous Cosmetics brush cleaner online but you can purchase my other favourite spot cleaning products from here and here.
 
Swipe the brush back and forth until all product is removed
Favourite spot cleaning products
However the best way to clean your brushes is to give them a really good deep clean. Every makeup artist does this after they have finished using their brushes for the day. There are many products you can use to do this. Some people choose to use baby shampoo but my favourite product is Sards Wonder Soap. I like this product because it cuts through everything. Foundation and lipstick, especially red lipstick, are tough to get out of brushes. I find that the Sards soap gets the job done quicker than anything else I’ve tried.
 
Can be found in the cleaning aisle with the laundry products
Firstly you want to run some warm water, make sure that it’s not too hot. Place the palm of your hand under the water flow. Rest the bristles of the brush on your fingers (make sure the bristles are always facing down), the water will run down your palm onto your fingers. You don’t want to put your brush directly under the water flow.
 

Once your bristles are damp run the brush along the Sards soap a couple of time, now rub the brush along your fingers a couple of times. This creates a washboard effect and the friction will allow the soap to work among the bristles to remove any product. Once you’ve built up a lather place your palm back under the water and run the brush along you fingers to remove the Sards soap. If the brush still looks dirty repeat the process until product is remove.


To test if the product is no longer in the brush, once the lather has formed pinch the bristles between your fingers, the lather will be pushed up and out of the bristles. If the soap is clean, so is your brush.

Make sure to remove all soap from the bristles once finished cleaning. When your brush is clean squeeze out any excess water then reshape your brush. To dry place the brush on its side. It’s best if your bristles sit over the edge of something. This allows the air to flow around all the bristles and also helps ensure the brushes shape. Laying a brush on a flat surface is going to result in one side of the brushes bristles being flat. Allow the brush to dry and you’re all done.


Tips: Never ever dry your brushes with the bristles facing up. This allows water to drip down into the ferrule which can eventually lead to the breakdown of the glue that is holding your brush together. This can cause hairs to fall out when applying makeup to your face and shorten the lifetime of your brushes.
You don’t have to clean your brushes every day if you are only using them on yourself however I do recommend that you clean deep clean them at least once a week.
Wash your brushes at night, that way they will be dry in the morning and ready to use.
An optional step to deep cleaning your brushes is to spray them with an alcohol based spray once done. I do this once I’ve lined all my brushes up to dry and again before I put them away. You can purchase the spray I use from here.

Monday 25 February 2013

The 2013 Oscars - My Favourites

With every red carpet event there comes a paparazzi frenzy over who was the best and worst dressed, the Oscars being no exception. Yesterday we got to catch a glimpse of Hollywood’s elite dressed to impress. Here are some of my hair, makeup and dress favourites of the evening.

A trend that stuck out at this year’s Oscars was the natural makeup look. A lot of stars seemed to be sporting this look and my two favourites where Charlize Theron and Amy Adams. Both women looked exceptionally stunning and flawless.
 
Charlize Theron
Amy Adams
Old Hollywood glamour also made a comeback at this year’s Oscars. Adele was seen rocking her usual classic liner however the stand out for me was Jessica Chastain who flaunted a bright red lip. Who said redheads couldn’t wear a red lip? Jessica’s old-school Hollywood glamour was complete with winged liner and a classic hairstyle.
 
Adele

Jessica Chastain
My absolute favourite makeup of the evening however was Jenna Dewan. She was positively glowing. She rocked a soft subtle smoky eye, a natural pink lip and flawless radiant skin.

Channing Tatum + Jenna Dewan
My favourite hairstyles of the evening belonged to Jennifer Lawrence and Nicole Kidman. Both women sported pulled back hair that was fastened at the nape of their necks. 
 
Jennifer Lawrence

Nicole Kidman

And finally my favourite dresses of the evening belong to Jessica Chastain, Charlize Theron, Sandra Bullock and Amanda Seyfried. With their perfect figures highlighted in these classic gowns all four women looked flawless.

Jessica Chastain

Charlize Theron

Sandra Bullock
Amanda Seyfried

Sunday 24 February 2013

Brushes Part 1 ... Why Clean Your Brushes?

Brushes are the tools of the trade for every makeup artist out there. They come in all shapes and sizes and are used for various techniques. Being a makeup artist myself I know the importance of cleaning my brushes. No one wants a pre-used brush near their face. Yet I see women time and time again using their own brushes over and over without cleaning them. When I ask them if they clean their brushes regularly the usual reply is, “Oh, do I need to? I’m only using it on myself.” I will admit when I was in high school I did the same thing, I had no idea about cleaning my brushes. So in today’s blog post I am going to go through why it is important to clean your brushes and later in the week I will be uploading a post on how to best clean your brushes.

Firstly, you want to clean your brushes because they collect bacteria. This is especially true if you are prone to acne. Not washing your brushes means that there is bad bacteria collecting in your brushes. Each time you use your brush you are putting that bacteria on your face increasing the likelihood of more breakouts.
Secondly, if you are not cleaning your brushes you will not reap the rewards of what that little brush is designed to do. A dirty fluffy brush isn’t going to give you a wonderfully blended edge. This is especially true if you’re trying to create a beautiful subtle look but said brush has been used the weekend before on your smoky eye, what you’re going to end up with instead is a mess. Cleaning your brushes is a must if you want to create a beautiful look every time.
Lastly, you should want to clean your brushes because they are an investment. Just because a brush cost you $5 does not mean it is not good quality (my favourite angled liner brush cost me under $5, score). No matter the price of the brush you should still look after it, after all you want it to last. Well looked after brushes can last you for years, maybe even a lifetime. Just think, all that money you are saving on replacing your brushes can be used to buy more makeup, yay!

Having a clean, soft, fluffy brush on your face is a wonderful feeling. Later in the week I will share with you a few simple ways to clean your brushes.

Monday 18 February 2013

Sally Hansen 677 Shoot the Moon + Barry M 353 Ruby Glitter

As a makeup artist I am always on the hunt for new beauty products, whether it is makeup, nail polishes or skin care. However with my current income it makes it hard to continually buy full sized products to test out. It’s especially expensive if you have a reaction to the product you’ve just started using and have to find another alternative.
While on YouTube I came across one of Michelle Phan’s videos about her new company ipsy. I was disappointed to find that at this current time they do not ship to Australia. However I then came across an Australian equivalent called bellabox. For $15 a month you are sent out five to six beauty products. The great thing about this box is that sometimes you get sample size bottles and other times you score a full sized product. In the February box I received a bottle of Sally Hansen nail polish.

Barry M 353 Ruby Glitter + Sally Hansen 677 Shoot the Moon
Sally Hansen nail polish is something that I’ve been meaning to try out but just haven’t got around to purchasing. So I was super excited when I found a bottle in my bellabox. The colour I got was number 677 Shoot the Moon. This is a wonderful silver colour. Eager to test this polish out I proceeded to give myself a manicure. The colour is beautiful. Never one to paint all my nails the same colour, I started hunting through my polish collection for something that would complement this colour. Barry M’s 353 Ruby Glitter was the perfect accompaniment, a clear polish with chunky black and pink glitter. I applied two coats of this over the Sally Hansen and was rewarded with a fun and sparkly manicure.
 
Completed manicure
Sally Hansen 677 Shoot the Moon
Completed manicure
Barry M 353 Ruby Glitter

Wednesday 13 February 2013

Valentine’s Day Cupcakes

Normally Valentine’s Day isn’t something I partake in. This year I wasn’t going to make an exception. I honestly find the whole thing a bit fake, the cards, the giant teddy bears, the overly expensive candies. It’s just another hallmark holiday.
However I did decide to whip up a little Valentine’s Day treat for my friends at work. There is nothing I love more than baking except for baking with a theme. My favourite type of cupcake is red velvet and what better occasion than Valentines to make them?
Here are a couple of pictures of what I whipped up and the recipe I use. Enjoy.

Red Velvet Cupcakes
60g unsalted butter, room temperature
150g caster sugar
1 large egg, lightly beaten
10g cocoa powder
20ml red food colouring
½ teaspoon vanilla extract
120ml buttermilk
150g plain flour
½ teaspoon salt
½ teaspoon bicarb soda
1 ½ teaspoon white wine vinegar
 
Ingredients

·         Preheat the oven to 170C.
·         Line a 12-hole cupcake tray with patty cases.
·         Using an electric mixer on a high speed beat together the butter and sugar until light and fluffy.
·         Slowly add the egg and beat until everything is well combined.
·         In a small bowl mix together cocoa, red food colouring and vanilla until it forms a smooth paste.
·         Add the paste and beat until everything is combined.
·         Scrap down the sides of the bowl to ensure everything is combined.
·         Reduce mixer to a slow speed and slowly add half the buttermilk, when well mixed add half the flour. Repeat this process with the remaining buttermilk and flour. Beat mixture until smooth.
·         Add salt, bicarb and white wine vinegar and beat on a high speed for a couple of minutes.
·         Spoon into prepared tray.
·         Bake for 20-25 minutes or until cake springs bake when lightly touched.
·         Cool and ice.

Coming out of the oven

Simple Butter Frosting
250g butter, cubed, at room temperature
450g pure icing sugar, sifted
60ml milk

·         Using an electric mixer with the whisk attachment whip the butter on a high speed until nearly white and very fluffy. Scrape sides frequently.
·         Gradually add spoonful’s of the icing sugar to the butter.
·         Once all the icing sugar has been added beat mixture until very pale and fluffy.
·         Gradually add milk and beat until smooth and well combined.
·         If desired add colouring and flavouring to the mixture, such as vanilla bean paste.
  
The Finished Product


Cupcake recipe from http://redvelvetcupcakes.com.au/

Monday 11 February 2013

Illamasqua's Rubber Brights - Prosperity

Recently I have been obsessed with doing my nails. It’s not something I usually do because I’m not supposed to wear bright colours at my day job. However lately I haven’t been working much so I’ve taken the opportunity to experiment with different nail varnishes. This includes colours, finishes and glitters. So every couple of days I have been changing my nail colour.
 
Currently I am wearing Illamasqua’s nail varnish in the shade Prosperity. Prosperity is part of Illamasqua’s new Rubber Brights collection. These polishes were “inspired by the colour-coded specialities of the dominatrix Rubber Boot Girls of 1920s Berlin”. I first saw these polishes in one of Illamasqua’s YouTube tutorials. On a recent trip to Sydney I visited an Illamasqua counter picking up a few polishes, one of them being a beautiful purple Rubber Brights varnish.

Shades available in the Rubber Brights collection

At first I was a little skeptical as to whether or not these varnishes would deliver a matte rubber-like finish as promised. After prepping my nails and applying the first coat of the polish I was surprised to see it dry like actual rubber. At first I wasn’t sure if I liked the finish the polish gave off as it’s a little weird but after the second coat I was excited. Here’s a product that, as far as I’m aware, is the first of its kind.
 
Illamasqua's nail varnish in Prosperity

However at the time I did not realise that this particular nail varnish required no top coat. Having applied a top coat my nails still look slightly rubbery but not to the extent that they did when they were matte.  
 
With Top Coat
Ive always loved Illamasqua for their quirky and unique style, their bold and beautiful array of products. They encourage people of all ages and genders to express themselves. This is just one of their unique products that inspires people to be individuals. Personally I absolutely love it and would definately recommend it to nail polishes lovers looking for something to express their alter ego.

Application instructions: Prepare the nail with a base coat. Using the superfine brush provided, create colour-intense impact by applying two coats of your Rubber Brights Nail Varnish, waiting 30 seconds between coats. Allow two minutes drying time for the perfect, bold rubber-finish. No top coat required.