Tuesday 26 March 2013

Egyptian Magic

118ml (4oz) tub of Egyption Magic
Recently I have been hearing only good things about a product called Egyptian Magic All Purpose Skin cream. This cream is made up of six ingredients from nature, making it 100% natural and derived only from living plants and organisms. It contains olive oil, beeswax, honey, bee pollen, royal jelly and bee propolis.

This cream can be used for a number of different things including but not limited to hand cream, night cream, scar reduction and bruising reduction.

On a recent visit to my favourite makeup store, Makeup and Glow, I decided to purchase this amazing little tub of magic. The cream has a Vaseline type consistence in the jar. To apply it you simple take a small amount out of the jar, rub it between your hands until it resembles oil and apply. A little bit really does go a long way, so I’ve used hardly any of my jar.

So far I have been using it for a week. I suffer from very dry skin all over my body and occasional eczema on my upper arms. Normally I have very dry and flaky skin on my shins, after using this product for a week I have noticed a definite improvement in my dry skin. My skin is still slightly dry but definitely improved and it no longer has that dry flaky look. I’ve also noticed that the eczema on my arms isn’t as bad. There are still dry spots on my upper arms but all redness is gone.

Overall I think it’s a good product. It’s a definite plus that it’s an all-natural product. In my opinion it is a little pricey but so far it’s been worth it.


Monday 18 March 2013

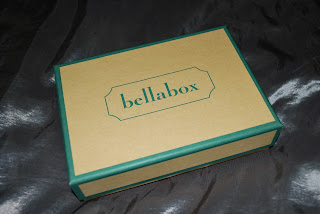
March Bellabox

In a previous post I believe I mentioned the Bellabox. The Bellabox is a $15 a month subscription. Every month you are sent five to six beauty products to test out. Sometimes you will receive sample size products and other times you can get full sized products. It’s a great little subscription if you are always on the hunt for new beauty products to try out.

So to give you an idea of what to expect from the Bellabox I have decided to dedicate this post to the March Bellabox.

Firstly once you open the postage parcel you will find a cute little box that contains all your goodies.
 

When you open the box you will find a card that lists all the products in the box and what their retail value is.
 

 Under this you will find your products wrapped in tissue paper.


This month I received two full sized products which I’m pretty excited about but I’ll go through them in the order that’s on the description card.

First product out of the box was Ocean Essence Summer Breeze Shower Gel. The bottle itself is pretty small. I haven’t used it yet but I did open it to see what it smelt like. Honestly I wasn’t over excited with the smell, it was pleasant but nothing unique.
This products retail price is $4.95 for 20ml


The second product is a Designer Brands Lip Pencil in the shade 629 Nude. This is one of the full size products. At $4.99 a pencil its pretty good value. The texture of the pencil is average. It applies easily but isn’t as nice as some other lip pencils I’ve tried. The first thing I noticed and liked about this product though was that the pencil lid had an inbuilt sharpener which I find really nifty.
 

Third product is Suigo Ultimate Control Shampoo and Ultimate Control Conditioner. The bottles are a decent size so I will be able to get several washes out of them to determine whether or not I like this product. It is supposed to be for weak brittle hair. At the moment my hair is pretty health so I’m not sure if it will show any improvements.
These products come in 260ml bottles, both at $22.50


The fourth product was another full sized product. I received a Clinique High Impact Lipstick in the shade Extreme Pink. These lipsticks retail at $36 a piece so some months you definitely get your $15 subscription back in product. The lipstick isn’t a colour I’d pick out for myself but it feels nice and moisturising. I’ll definitely give it a go.


Lastly I received a Swisse Active Energy Bar. I found this a bit random as I’ve never received a food product before. However I do like the Swisse range so I may try it.
Product retails at $2.39 a bar


Well that is all for today. Comment below if you want to see more Bellabox posts.

Saturday 9 March 2013

OPI - Goldeneye

Sorry I haven’t posted this week, I’ve been pretty busy with work this week. So here is just a quick nail blog as I didn’t have much time to do anything else.

Recently I have been obsessed with OPI polishes. They have an amazing array of colours as well as textures and finishes. Of course at the moment my favourite nail varnish is of the OPI brand. For Christmas I received the mini nail lacquers set called the Bondettes, this of course was released around the same time Skyfall came out in cinemas. I absolutely love the Bond movies and was excited to try out the four mini polishes I got. I immediately fell in love with the colour Goldeneye. It is this amazing gold that is glittery and shimmery. Honestly it is absolutely divine. I’ve taken a couple of snaps of my manicure but honestly the photos don’t do this polish justice. If you love gold I seriously suggest investing in this colour and if you don’t like gold? Seriously, invest in this polish anyway. Just remember that any collection brought out is only stocked for a short time.

Goldeneye + Alpine Snow

Goldeneye + Alpine Snow
As you can see I haven’t painted all my nails with Goldeneye, the polish on my ring finger is another OPI varnish in the shade Alpine Snow. I found I had to apply three coats of the white to get a solid colour where as I only needed the two coats with Goldeneye.   

Saturday 2 March 2013

Brushes Part 2 … How to Clean Brushes

Earlier in the week I posted about why it is important to clean your brushes and now as promised I’m writing a post on how best to clean your brushes.

The quickest and easiest way to clean your brushes is to spot clean. To do this you simple take a tissue, spray on some brush cleaner and wipe your brush backwards and forward. You do this until there is no product left in the bristles. This is an easy way to remove colour from eye shadow brushes for people at home who don’t want to deep clean their brushes every day. Makeup artist also do this between clients. Not only does brush cleaner remove makeup from brushes it also sanitises them, killing that unwanted bacteria I mentioned earlier in the week. I couldn’t find the Gorgeous Cosmetics brush cleaner online but you can purchase my other favourite spot cleaning products from here and here.
 
Swipe the brush back and forth until all product is removed
Favourite spot cleaning products
However the best way to clean your brushes is to give them a really good deep clean. Every makeup artist does this after they have finished using their brushes for the day. There are many products you can use to do this. Some people choose to use baby shampoo but my favourite product is Sards Wonder Soap. I like this product because it cuts through everything. Foundation and lipstick, especially red lipstick, are tough to get out of brushes. I find that the Sards soap gets the job done quicker than anything else I’ve tried.
 
Can be found in the cleaning aisle with the laundry products
Firstly you want to run some warm water, make sure that it’s not too hot. Place the palm of your hand under the water flow. Rest the bristles of the brush on your fingers (make sure the bristles are always facing down), the water will run down your palm onto your fingers. You don’t want to put your brush directly under the water flow.
 

Once your bristles are damp run the brush along the Sards soap a couple of time, now rub the brush along your fingers a couple of times. This creates a washboard effect and the friction will allow the soap to work among the bristles to remove any product. Once you’ve built up a lather place your palm back under the water and run the brush along you fingers to remove the Sards soap. If the brush still looks dirty repeat the process until product is remove.


To test if the product is no longer in the brush, once the lather has formed pinch the bristles between your fingers, the lather will be pushed up and out of the bristles. If the soap is clean, so is your brush.

Make sure to remove all soap from the bristles once finished cleaning. When your brush is clean squeeze out any excess water then reshape your brush. To dry place the brush on its side. It’s best if your bristles sit over the edge of something. This allows the air to flow around all the bristles and also helps ensure the brushes shape. Laying a brush on a flat surface is going to result in one side of the brushes bristles being flat. Allow the brush to dry and you’re all done.


Tips: Never ever dry your brushes with the bristles facing up. This allows water to drip down into the ferrule which can eventually lead to the breakdown of the glue that is holding your brush together. This can cause hairs to fall out when applying makeup to your face and shorten the lifetime of your brushes.
You don’t have to clean your brushes every day if you are only using them on yourself however I do recommend that you clean deep clean them at least once a week.
Wash your brushes at night, that way they will be dry in the morning and ready to use.
An optional step to deep cleaning your brushes is to spray them with an alcohol based spray once done. I do this once I’ve lined all my brushes up to dry and again before I put them away. You can purchase the spray I use from here.